Pabbly Connect Tutorial: A Complete Beginner’s Guide to Building Workflows
This Pabbly Connect tutorial walks you through everything from creating your account to building advanced multi-step workflows. Whether you have never automated anything before or you want to sharpen your skills, this guide covers triggers, actions, webhooks, filters, and routers with real examples. By the end, you will know exactly how to use Pabbly Connect to save hours of manual work.
What Is Pabbly Connect?
Pabbly Connect is a no-code automation tool that connects thousands of apps together. It moves data from one app to another automatically, without you writing a single line of code.
Think of it as a digital assistant that watches one app for an event, then instantly performs an action in another app. That could mean adding a new lead to your CRM, sending a Slack alert, or updating a spreadsheet.
- Connects thousands of popular business apps
- Uses a simple trigger-and-action workflow model
- Built for beginners, but powerful enough for developers
- Works with CRMs, email tools, payment gateways, forms, and more
Why Use Pabbly Connect?
Manual data entry wastes time and invites human error. Automation software like Pabbly Connect removes that repetitive work so your team can focus on higher-value tasks.
It is also known for being budget-friendly compared to other automation platforms, while still offering multi-step workflows, filters, routers, and webhook support on its paid plans.
- Saves hours of manual copy-paste work every week
- Reduces data entry errors between apps
- Works in real time using instant webhooks
- Free internal steps like filters and formatters do not use up your task allowance
Create an Account
Getting started with Pabbly Connect takes just a couple of minutes. Follow these steps to set up your account.
- Go to the official Pabbly Connect signup page
- Enter your email address and create a password, or sign up using Google
- Verify your email address through the confirmation link
- Log in to access your Pabbly Connect dashboard
No credit card is required to start on the free plan, so you can explore the dashboard and build your first workflow before deciding whether to upgrade.
Dashboard Overview
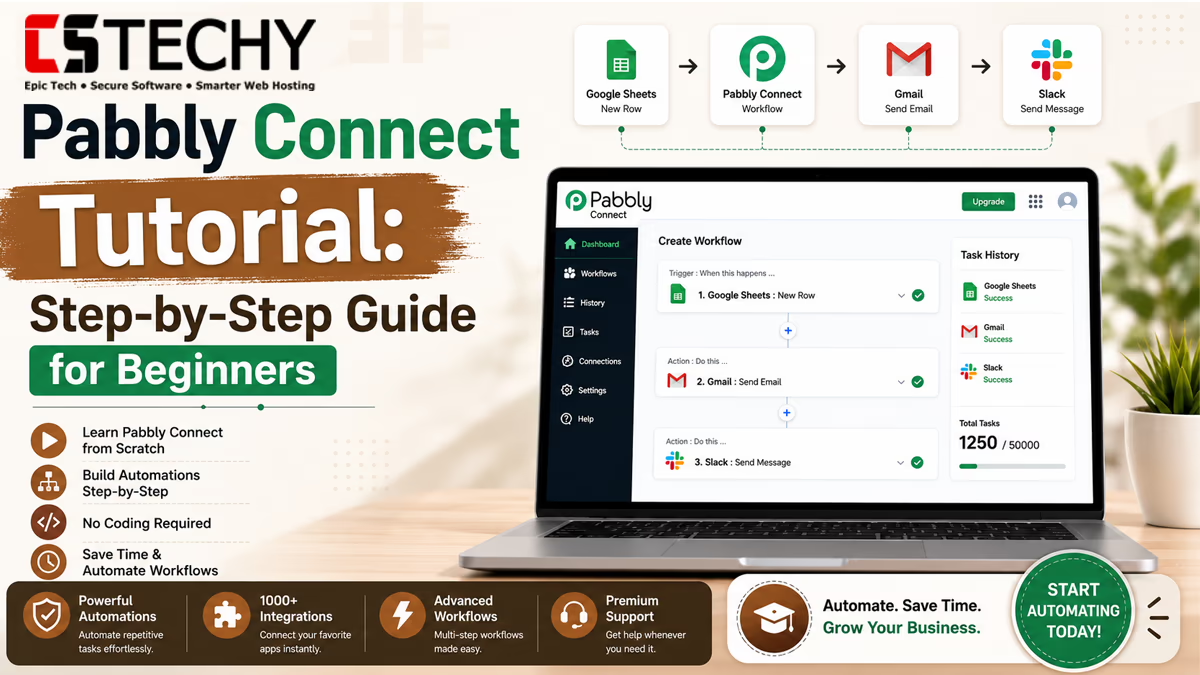
Once you log in, you land on the main dashboard where all your workflows live. Understanding this layout early makes the rest of this Pabbly Connect tutorial much easier to follow.
- Workflows section: Lists every automation you have created, along with its on/off status
- Create Workflow button: Starts the process of building a new automation
- Folders: Let you organize workflows by client, project, or app
- Task history: Shows how many tasks you have used and how many remain
- History logs: Record every time a workflow runs, useful for troubleshooting
Why the Dashboard Layout Matters
Spending five minutes clicking through each dashboard section before building anything will save you confusion later, especially when you start managing several workflows at once.
As you create more automations, folders become especially valuable. Grouping workflows by client name or by app category keeps your dashboard tidy instead of turning into one long, unsorted list.
The task history panel deserves regular attention too. Checking it weekly helps you spot a workflow that is unexpectedly consuming more tasks than planned, often because a filter condition needs adjusting.
Understanding Triggers
A trigger is the event that starts a workflow. It is always the first step, and every workflow needs exactly one trigger.
For example, a trigger could be “a new form submission arrives” or “a new order is placed.” Pabbly Connect constantly checks for this event, and the moment it happens, the workflow springs into action.
- Every workflow starts with one trigger
- Triggers never consume your monthly task allowance
- Common triggers include new form entries, new orders, and new leads
- Some apps support instant webhook triggers for real-time automation
Understanding Actions
An action is what happens after the trigger fires. This is the step that actually does something, such as sending an email or updating a record.
You can chain multiple actions together in a single workflow. Each additional action step does count toward your monthly task usage, since it performs work in an external application.
- Actions run in the app you choose, using data from the trigger
- You can add several actions to build a multi-step workflow
- Each action step against an external app uses one task
- Internal actions like filters and formatters remain free
Trigger vs Action at a Glance
| Aspect | Trigger | Action |
|---|---|---|
| Position in Workflow | Always first | Comes after the trigger |
| Task Consumption | Never counted as a task | Counted as a task per external step |
| Example | New lead submitted on Facebook | Add lead to Google Sheets |
| Quantity per Workflow | Exactly one | One or more |
Build Your First Workflow
Now let’s put the theory into practice. Here is a simple, beginner-friendly workflow you can build in a few minutes.
- Click “Create Workflow” and give it a clear, descriptive name
- Choose your trigger app, such as Google Forms
- Select the specific trigger event, like “New Response in Spreadsheet”
- Connect your account for that app when prompted
- Send a test submission so Pabbly Connect can capture sample data
- Add your action app, such as Gmail or Google Sheets
- Map the fields from your trigger data into the action step
- Run a test to confirm everything works correctly
- Turn the workflow on to make it live
Once it is live, this workflow runs automatically every time a new form response comes in, with zero manual effort on your part.
Connect Apps
Pabbly Connect supports thousands of integrations across categories like CRM, marketing, ecommerce, and payments. Connecting an app usually takes just a few clicks.
- Search for your app by name in the trigger or action step
- Authorize the connection, usually through a login popup or an API key
- Give the connection a recognizable name if you plan to use multiple accounts
- Reuse saved connections across different workflows without reconnecting
If an app is not natively supported, Pabbly Connect’s webhook and API modules let you connect almost any platform that has an API.
Using Webhooks
Webhooks allow real-time, instant automation instead of waiting for Pabbly Connect to check for new data on a schedule. Many apps support sending data directly to a Pabbly Connect webhook URL.
- Create a new workflow and choose “Webhook” as the trigger
- Copy the unique webhook URL that Pabbly Connect generates
- Paste that URL into the settings of your trigger app
- Send a test event so Pabbly Connect captures the webhook data structure
- Build your action steps using the incoming webhook fields
Webhooks are especially useful for apps that do not have a native Pabbly Connect integration, since almost any tool that can send an HTTP request can trigger a workflow this way.
Using Filters
Filters let your workflow run only when certain conditions are met. Without a filter, every trigger event moves forward through the entire workflow.
For example, you might only want to send a welcome email to leads from a specific country, or only notify your sales team about orders above a certain amount.
- Set conditions based on values coming from your trigger
- Combine multiple conditions using AND or OR logic
- Filter steps never consume your monthly task allowance
- Stop irrelevant data from reaching your action steps
Using Routers
Routers let a single trigger send data down different paths depending on the conditions you set. This is useful when one event should lead to different outcomes.
For instance, a new order could route high-value customers to a VIP follow-up email, while smaller orders go through a standard confirmation email instead.
- Create multiple paths from a single trigger
- Each path can have its own filter conditions and actions
- Routers help you avoid building several separate workflows
- Path routers do not consume tasks on their own
Testing Automations
Always test a workflow before switching it live. Skipping this step is one of the most common reasons beginner automations fail silently.
Testing Checklist
- Send a real or sample trigger event to confirm data comes through correctly
- Check that every field mapped in your action step shows the right value
- Review the workflow history log to confirm the test ran successfully
- Test edge cases, such as blank fields or unusual characters
- Only turn the workflow on after a successful test run
It also helps to test with more than one sample record. A single successful test can hide problems that only appear with different data, such as a missing phone number or an unusually long text field.
If a test fails, check the history log first. It usually shows exactly which step failed and why, which saves you from guessing where the workflow broke down.
Real Workflow Examples
Seeing practical examples makes it easier to imagine how Pabbly Connect fits into your own business. Here are a few workflows beginners commonly build.
- Lead capture: New Facebook Lead Ad entry automatically added to a CRM and a welcome email sent
- Order notifications: New WooCommerce order sends customer details to Google Sheets and a Slack alert to the fulfillment team
- Appointment booking: New Calendly booking adds an event to Google Calendar and sends a confirmation email
- Support ticket routing: New form-based support request filtered by urgency and routed to the right team channel
Business Use Cases
Different types of users get value from Pabbly Connect in different ways.
- Freelancers: Automate client onboarding, from a signed contract to a welcome email and invoice
- Small businesses: Sync ecommerce orders, payments, and customer records without manual entry
- Agencies: Manage dozens of client workflows through shared folders and team member access
- Marketing teams: Automatically add new leads to email lists and trigger nurture sequences
Even non-technical teams can benefit quickly. A support team, for instance, can automate ticket tagging based on keywords in the subject line, so urgent issues reach the right person without anyone manually sorting the inbox.
Common Beginner Mistakes
- Turning a workflow on before properly testing it
- Forgetting that action steps consume tasks, while triggers and filters do not
- Not naming workflows clearly, which becomes confusing once you have several running
- Skipping field mapping checks, leading to blank or incorrect data downstream
- Building separate workflows instead of using routers for branching logic
Best Practices
- Name every workflow and folder clearly from the start
- Use filters early to avoid wasting tasks on irrelevant trigger events
- Test with real sample data whenever possible, not just placeholder text
- Review your task history regularly so you are not surprised by usage
- Document each workflow’s purpose for teammates who may need to edit it later
It also helps to revisit older workflows every few months. Apps update their fields and APIs over time, and a quick review can catch a broken connection before it causes missed data.
Advanced Tips
- Use the Iterator step to loop through arrays, such as multiple line items in an order
- Combine routers and filters together for complex, multi-branch decision logic
- Use the JavaScript or Python code module when you need custom data transformations
- Set up auto re-executions so failed steps retry automatically instead of failing silently
- Use custom variables to store and reuse values across multiple steps in a workflow
Once you are comfortable with the basics, try combining several advanced features in one workflow. For example, an Iterator can loop through order line items while a Router sends high-value items down a separate approval path.
Developers can push this further with the Code by Pabbly module, running short JavaScript or Python snippets to reshape data before it reaches the next action step. This is especially useful when an API returns data in a format your destination app cannot read directly.
Pros & Cons
Pros
- Beginner-friendly, drag-and-drop workflow builder
- Free internal steps like filters, routers, and formatters
- Instant webhook support for real-time automation
- Strong video tutorial library for self-guided learning
Cons
- No live chat support on most plans
- Interface is functional but less visually polished than some competitors
- Some advanced modules, like Python code, require basic programming knowledge
Comparison with Zapier
Zapier is the most recognized name in automation, but its task-counting model works differently than Pabbly Connect’s. Zapier typically counts formatter and filter steps as billable tasks, while Pabbly Connect does not.
- Learning curve: Both platforms use a similar trigger-and-action structure, so skills transfer easily between them
- Task efficiency: Pabbly Connect workflows often use fewer billable tasks for the same automation
- Interface polish: Zapier’s builder is generally considered more refined
- Pricing flexibility: Pabbly Connect offers an optional one-time lifetime payment, which Zapier does not
Comparison with Make
Make (formerly Integromat) uses a visual, flowchart-style canvas that some advanced users prefer for highly complex workflows.
| Comparison | Pabbly Connect | Make |
|---|---|---|
| Builder Style | Simple, linear workflow view | Visual, flowchart-style canvas |
| Internal Steps | Filters and formatters are free | Can consume multiple operations per run |
| Pricing Model | Annual subscription or one-time lifetime | Subscription only |
| Best For | Beginners and budget-focused users | Advanced users building complex branching logic |
Frequently Asked Questions
How do I start using Pabbly Connect?
Sign up for a free account, create your first workflow, choose a trigger, add an action, and test it before turning it on.
Is Pabbly Connect good for beginners?
Yes, its drag-and-drop builder and step-by-step workflow creation make it accessible even with no coding experience.
What is a trigger in Pabbly Connect?
A trigger is the event that starts a workflow, such as a new form entry or a new order being placed.
What is the difference between a trigger and an action?
A trigger starts the workflow and never uses a task, while an action performs work in another app and does use a task.
Do filters use up my task limit?
No, filters, routers, and formatters are internal steps and never consume your monthly task allowance.
Can I use webhooks in Pabbly Connect?
Yes, Pabbly Connect supports instant webhooks, letting almost any app with an API trigger a workflow in real time.
How many apps does Pabbly Connect support?
Pabbly Connect supports thousands of app integrations across marketing, sales, ecommerce, and support categories.
Can I build multi-step workflows?
Yes, paid plans support unlimited multi-step workflows with several action steps chained together.
Is Pabbly Connect better than Zapier for beginners?
Both are beginner-friendly, but Pabbly Connect’s free internal task policy often makes it more cost-effective to learn on.
Final Verdict
This Pabbly Connect tutorial covered everything from your first login to advanced routing logic. The platform’s biggest strength for beginners is its simple trigger-and-action model, combined with free filters and formatters that stretch your task allowance further.
Start small with a single workflow, test it thoroughly, and expand into filters, routers, and webhooks as your confidence grows. Once you get comfortable with the basics in this guide, building complex, multi-step automations becomes second nature.
Want to keep learning? Browse more automation guides on CSTechy to explore workflow templates, tool comparisons, and advanced automation strategies.